But then I saw this tutorial from Victorious Cupcakes on www.Goodtoknow.co.uk recipes for teacher thank you cupcakes.
Feeling Inspired, I decided to make our teachers some pretty vanilla cupcakes with apple toppers to share between them as a little personal thank you. Who Is Feeling Brave?!
So I dashed off to Pipedreams which is my nearest proper cake decorating store and bought two lovely silver boxes which carry 12 cupcakes each. I tried to find a "thank you" stamp or something with small enough letters for a cupcake topper but there was nothing suitable unfortunately.
Creating the Apple Toppers:
**This part needs to be done about 24 hours in advance to allow the fondant to dry**
Spending a fun afternoon together Clever Daughter and I had made the fondant elements of the apple. Admittedly I was really responsible for rolling fondant and advising, and she did all the hard stuff because I figured the teachers would appreciate it more from her little fingers.
She's not called Clever Daughter for nothing.
We used:

9" 23cm Rolling Pin - Non Stick Polyethylene

Ready-coloured fondant in Green and Red and a little Black. I used Dr.Oetker Regalice Ready to Roll Icing Colours 500g

10 Sets (30 Pcs) Plunger Cutters Sugarcraft Cake Decorating

Tala Pastry Cutters Set 6 Plastic
I used the cutter which was slightly smaller than the dimensions of the top of the cupcake.
Cornflour/Cornstarch to stop the fondant sticking to your rolling surface.
A small palette knife or non-serrated knife for cutting, and additionally to transport elements of the apple from the rolling area to the drying area.
Step 1: Leaves
- Roll out your green fondant on a nice sprinkling of cornflour. It does not have to be wispy thin, just a sensible strong width for a little leaf. I would guess at about 2mm thick.
- Using your smallest rose leaf cutter push into the fondant, give it a wiggle to loosen your leaf and then press down on the plunger to impress the veins.
- Now pick it up and when over a plate or good drying surface press the plunger down again and the leaf should drop right out.
- Leave to dry (I love an unexpected pun).

Step 2: Apples
- Now roll out the red fondant, as with the leaf this should not be super thin or they will break the moment you put them on the cupcake. Again, I estimate at 2mm thick.
- Using the smooth side of a round cookie or pastry cutter cut out circles of fondant.
- If I had a small letter press I would have imprinted "Thank You" in the middle of the apple at this stage.
- Using a knife cut a small triangle out of the top and a very wide and shallow triangle from opposite side. Please do keep the remaining fondant and waiting circles covered with cling film or they will dry more quickly than you think and you will find it very difficult to smooth the edges effectively.

- Now smooth those pointy edges with your fingers as if you are making a rounded heart shape on both sides. Once the top and bottom of the apple are curved and you will see that it has achieved a recognisable apple shape.

- Allow to dry on a flat surface.
Step 3: Stalk
- For the stalk take a small quantity of brown fondant (we mixed black and red together to achieve our brown colour), roll it out into a strip and then cut it so it looks like a ribbon about 1cm wide.
- And then using your palette knife or smooth knife start cutting at about 4mm intervals and you will see our stalk.

- Since the apple was generally looking pretty 2 dimensional I decided not to roll the twig to make it rounder, but rather embrace it's flat shape.
The Cupcakes!
The next day I baked 24 cupcakes using the Hummingbird vanilla cupcake recipe. I had recently read an article about how you shouldn't make batches of cake batter in double or half portions as it can be the chemistry of the ingredients in the original quantities which makes the cake work. So I faithfully made the first batch and while baking them I mixed up the second. I must say I did feel a bit silly, but I have to place my trust in the professionals.Unfortunately I overcooked the first batch a bit. I got The Fear that they weren't really done and gave them another 3 minutes. Too much! Not burnt, just a bit dry (I know because I ate one - shhh!). The second batch was allowed no such sympathy. Spot on time, perfect bounce, clean skewer, very happy.
While they cooled I whipped up a batch of Loryn's - should be patented - buttercream icing mix which looks a bit like this:
- 250g unsalted butter at room temperature
- 1kg icing sugar
- big dollop of cream cheese (I use Philadelphia original)
- about 1-2 tablespoons water added with caution to loosen it a bit.
- I also add a good splash of vanilla extract, well, because I love vanilla.
Preparing the Cupcakes:
We used:

1M icing nozzle
Jem 1M & 2D Stainless Steel Tips

Disposable piping bags
1 Roll of Savoy Disposable Piping Bags - 100 12" Bags
To pipe a rose
You need to always swirl from the centre outward, nozzle pointing 90 degrees to the cake surface and keeping it about 1.5cm above allowing the icing to fall onto the cupcake as you squeeze, while swirling around. When you have reached the edge of the cupcake stop squeezing and drag the bag away which breaks the icing off but may leave a messy edge, just pat it down gently with your finger for a nicer finish.
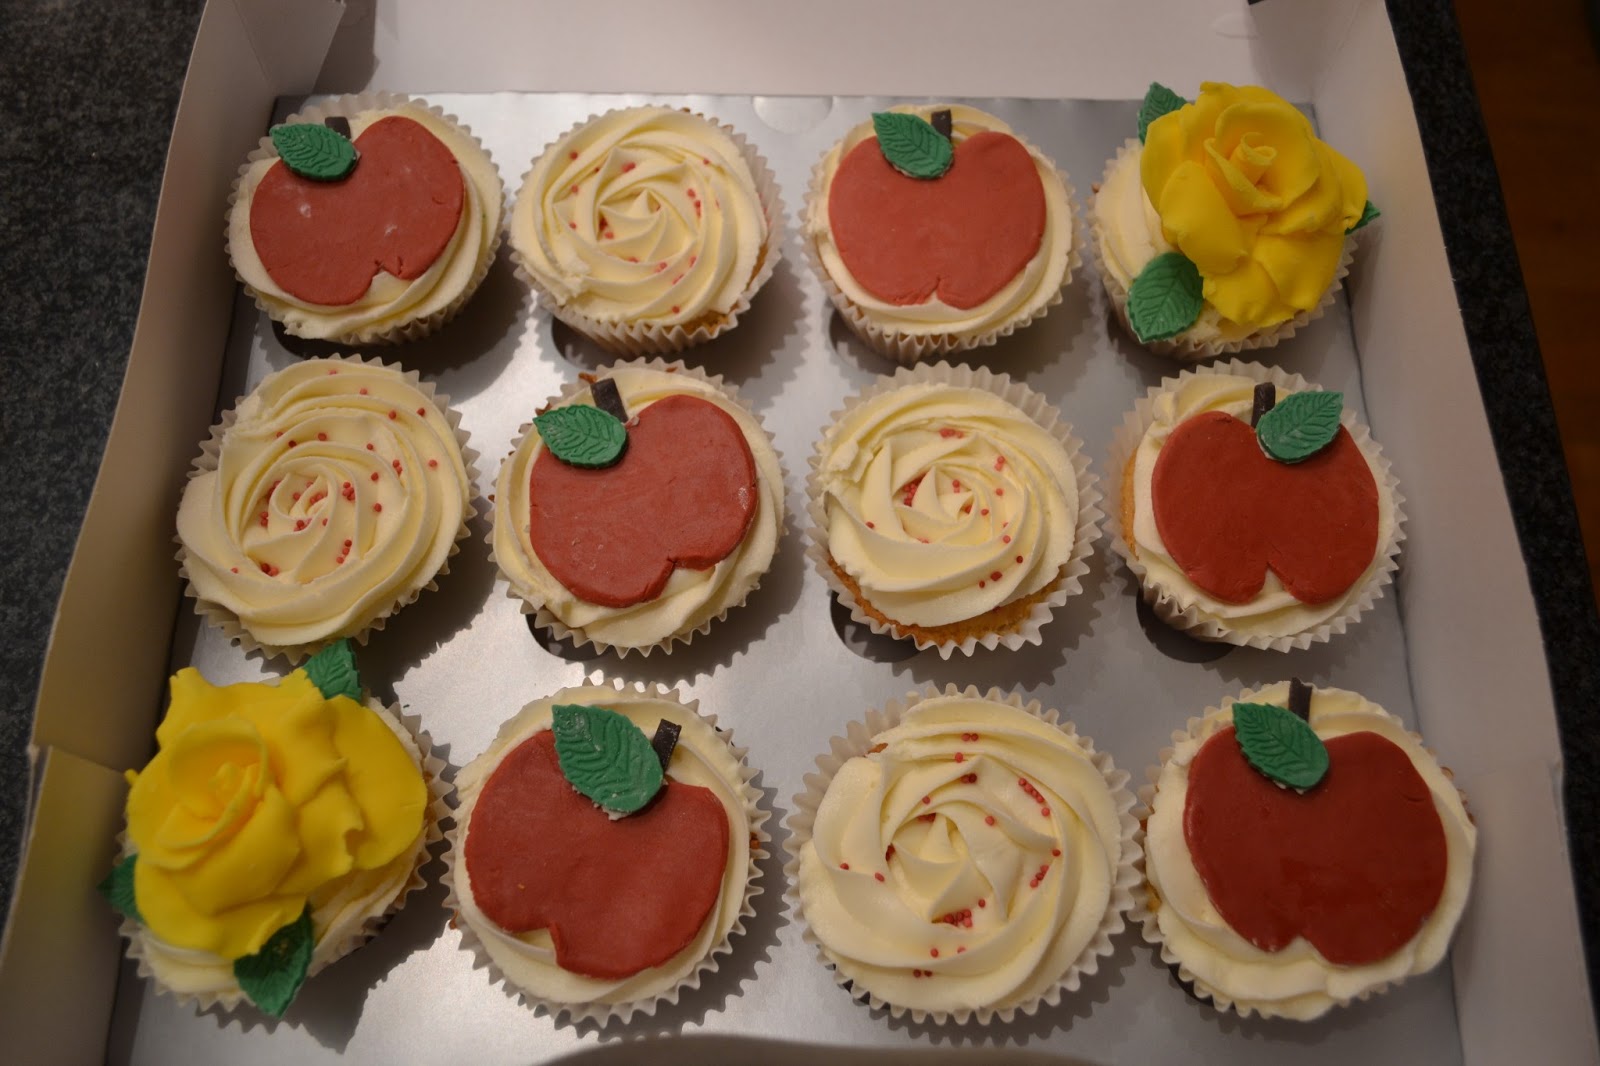
24 lovely cream coloured roses! They were so pretty that I decided not to make all of the cupcakes have toppers (not everyone likes fondant anyway!) and just shook a pinch of red sprinkles over the top of half of the cupcakes.
Time to assemble our apples!
On our freshly iced cupcake place the apple shape, and then the stalk as close as possible but not overlapping.
Now put a little of our extra buttercream on the back of one rose leaf and stick it down to cover the point where the stalk and the apple meet.
Tadaaaah! Fantastico!
Well the teachers definitely liked them anyway! And they made Clever Daughter feel like the smartest kid in town, fussing her for making such fabulous things. Which sounds like it had the opposite of the intended effect as they were supposed to make the TEACHERS feel special, but when you think about why they're fussing her it's sort of the same thing.
I am Tracey, and we make teacher-worthy cupcakes.
No comments:
Post a Comment