Monday 11 November 2013

Tissue Paper Pompoms for Party Decoration - Cheap, Practical, EASY and Effective!

If you have seen Pinterest you have probably seen the tissue paper pompom tutorials.

This is another one. But with less precision skill and more Give It A Go and Win attitude.

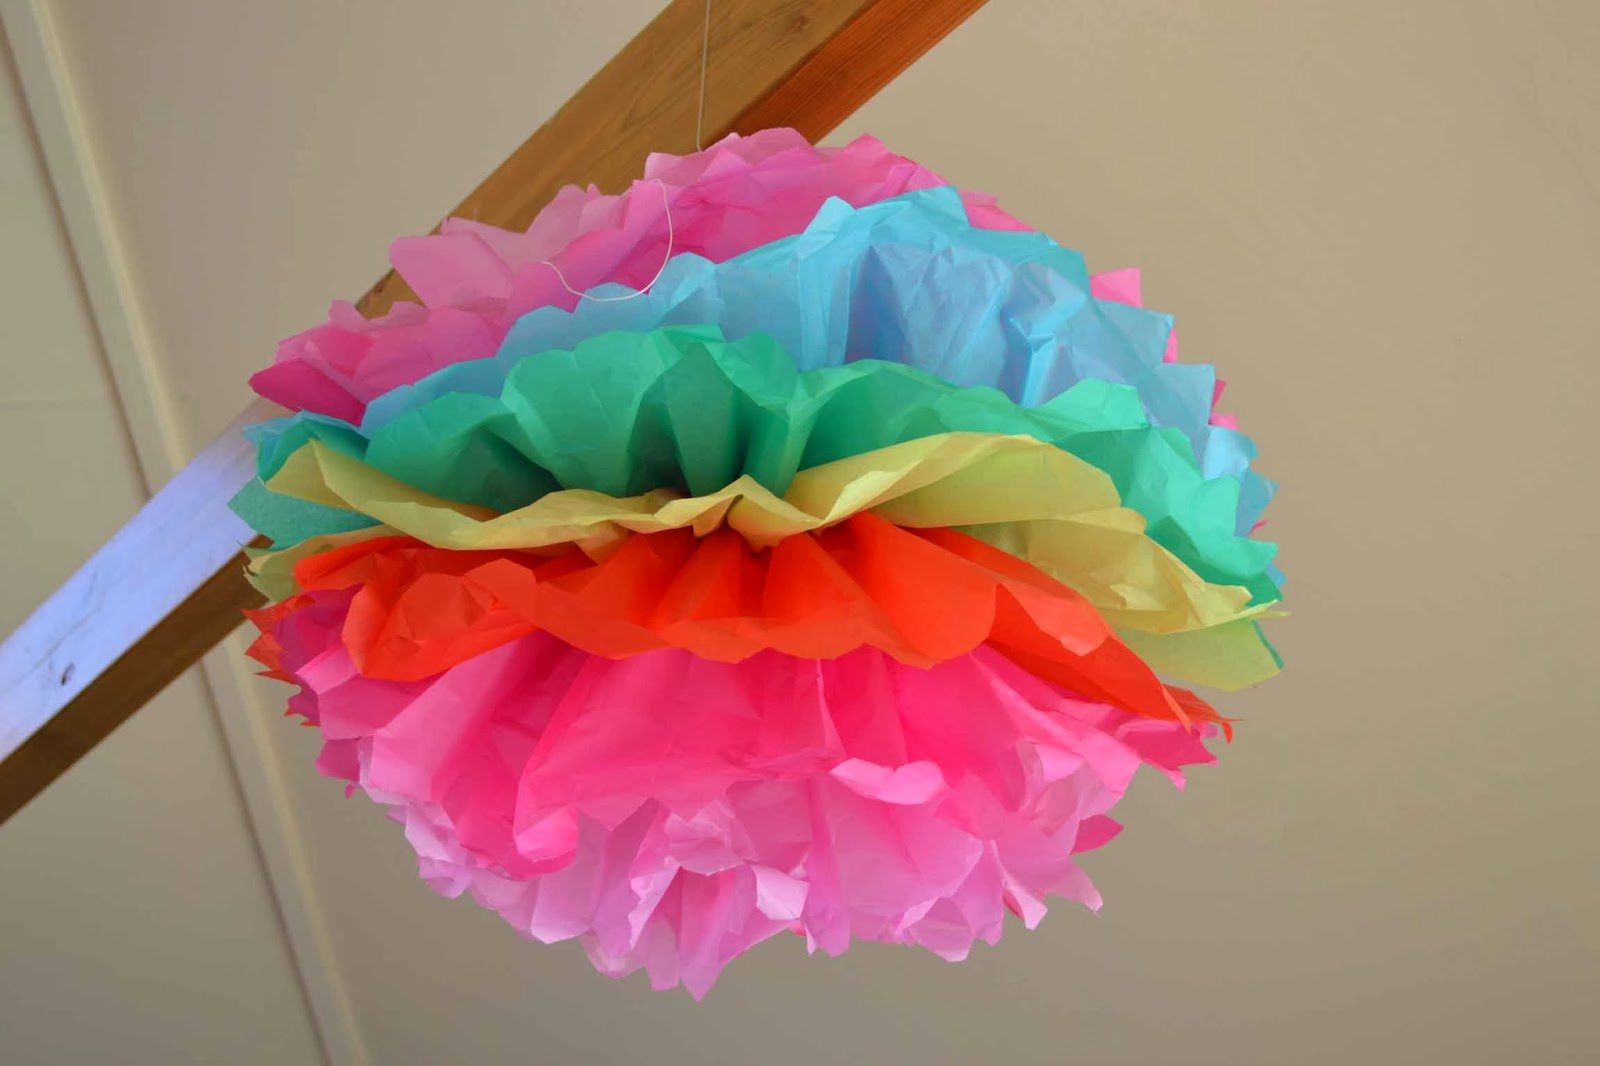
These pompoms are crazy-easy to make, take next-to-no skill, are super-quick and have that WOW factor at parties.

Seriously.

You are going to need 3 simple things:

  1. Tissue paper (10 sheets per large pompom)
  2. Hanging string/twine/chord/fishing nylon
  3. A fairly big pair of scissors
The first pompoms I made were for a Halloween party at my daughter's school. It was a big hall with children's art on already displayed on the walls so I thought we would benefit from some large-scale decorations. I whipped up 5 huge pompoms with the tissue paper I bought from Amazon:


 This is how:


  1. Stack up 10 sheets of your tissue paper so they are neat. If you are creating a single-colour pompom go straight to step 2, but if you are looking for a rainbow effect then you will need to sort your sheets into the right order.

    The colours on the bottom and the top will end up on opposing sides of your pompom so that makes it simple to make a rainbow effect: Bottom - Red, Orange, Yellow, Green, Blue, Indigo, Violet - Top with some suitable additional pages in-between to make up the 10 sheets.

  2. Time to concertina fold. I didn't measure a thing and sometimes the pages went skew, don't worry at all, just keep on folding! Keep running your hands along your concertina, flattening those fold edges as you go.
  3. When you reach the end of the paper (wasn't that easy?) fold your concertina in half.
  4. Using the middle point tie your hanging string around the centre as tight as you can. I made my strings hang in random directions, wherever the knot landed basically, but if you want all of yours to hang in the same pattern then pay attention:
    - If you want your rainbow to in vertical stripes around the pompom then make sure the knot is on the flat top of your folded concertina
    - If you want horizontal rainbow stripes then ensure the knot is on a skinny side-edge of your concertina


  5. Trimming the tips. Due to my inaccuracy and speed in folding I felt that snipping off two edges to make a point was probably ideal. Do this on both ends; another variation is to cut rounded edges which gives a lovely flowery rather than fluffy effect  (at the end of this post you will see a picture of one I forgot to cut so you can see that "style" too)


  6. Now for fluffing. Open out your concertina and then gently lift the first piece of tissue paper upward. Keep gently tugging so the first piece gets as close to the centre as you can manage.

    *NOTE* if your tissue paper tears don't worry about it, you really won't notice it, I did it on every single pompom at some point and they still looked gorgeous. Don't sweat the small stuff.


  7. Now its up to you whether you want to do the left side and then the right or one matching page from each half but fluff up 5 sheets on the right and the left concertina fans. You will know you are doing the right thing the moment you get started, trust me. Fluff, pull and tweak until you have a gorgeous half ball.


  8. Now flip it over and repeat.  Yes, you can lean the first side on your working surface, you will fluff the whole ball one last time before you hang it and get out any squashed sheets then.
  9. Hang your pompom and make last fluffing/adjustments.
  10. Admire your amazing artistry. You are fabulous and your party is going to be gorgeous! All your friends will ask where you got them. Some will suggest you should go into business.

    You are Master of the Party.


Epic.


Now if you want to SAVE your pompoms rather than responsibly recycling them in the paper waste then pay attention, it CAN BE DONE!

  1. Working from the middle pages (so the last pages you would have lifted when fluffing) tug gently outward.
  2. Then do the same with the second one pulling in the same direction. Keep going until they are all bent in a similar direction.
  3. Now run your fingers in a gentle pinching motion above and below each of the fold lines  and you will feel the pages start to fall into a neater place with each other.
  4. When you have a fairly neat concertina again collapse it up, fold in half and store it away! 
  5. If you are a cleverclogs you may want to print a photo of your pompom and elastic/tie it to your folded concertina so you know what it looks like when fluffed up and if it will work for your next party colour scheme.
    You know it makes sense.


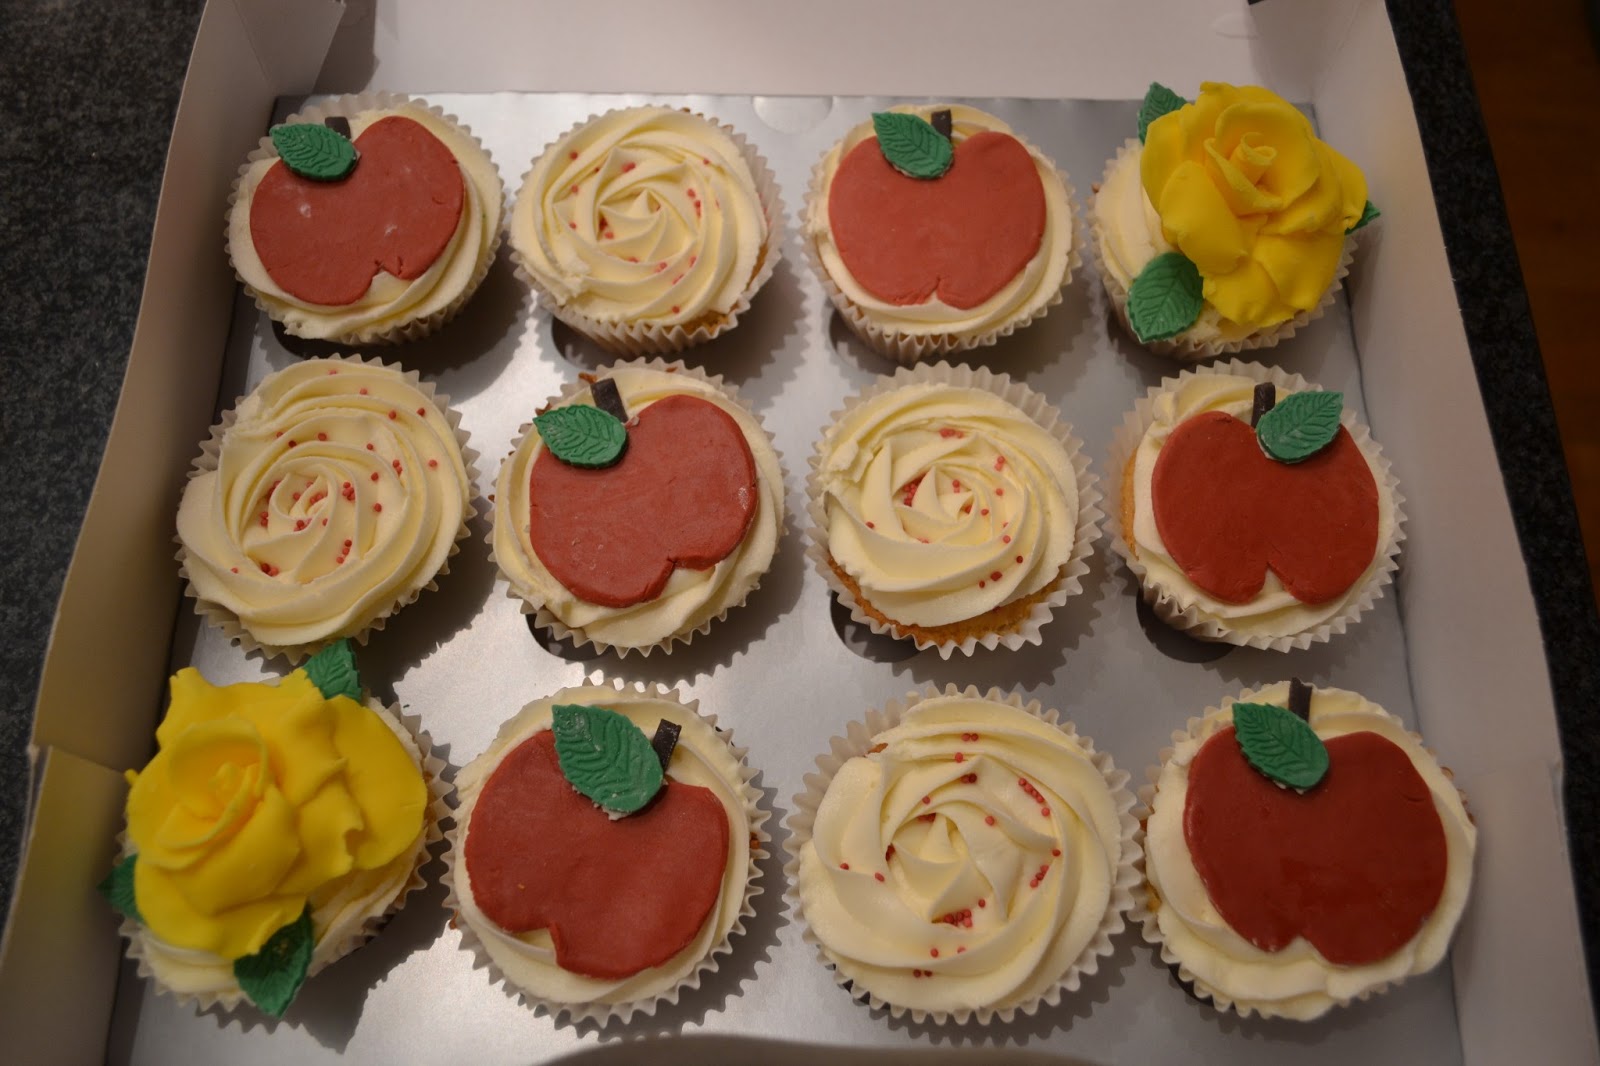
Here are some I made for my friend's baby shower:


And this is one where I forgot to trim the edges into a point before fluffing:
It seems to have had all the fun taken out of it...
 
This is a Pinterest example of the rounded edges.


So there you have it. They really are super simple. No they may not be perfect, but seriously, who is checking for accuracy at your party? 
Enjoy it and create some fabulous statement pieces. You won't regret it!


I am Tracey and I am proud that I can make a cheap, beautiful Tissue Paper Pompom in under 20 minutes with only 3 things!


Monday 29 July 2013

Part 2 of 2: The Grass Skirt - Simple Hawaiian Costume for Kids On a Budget Against the Clock

The "Grass Skirt"

It was the night before International Day at school. As Clever Daughter was getting ready for bed, she admitted that deep, deep down she really wanted to wear a dress with a grass skirt and the lei, rather than the shorts and shirt  + lei combination I had thought we were agreed on.

I'll Do My Best.

And Quickly!


I used:
  • The remainder of the tissue paper from the lei in my previous post (£0)
  • I had a roll of brown parcel tape, but for argument's sake you can get it at Poundworld (£1)
  • I also used some fabric ribbon I had kept from a gift, you could use regular gift wrap ribbon or string or anything like that.
  • Glue gun and glue; superglue would work too, or even stitching with thread.
This is how:
  • I was smart enough to measure her waist before she went to sleep, whew! 
  • Then I grabbed 3 of the greenest looking sheets of tissue paper I had left which were luckily still long enough (even after the lei cutting) to cover the full width I needed and about 6cm more. Lucky! 
  • I lay all three pieces on top of each other.
  • I marked out a waistband about a finger length long (no time to measure!)
  • Freehand I cut strips of about 2cm widths up to my allocated waistband.

  • Keep cutting until the whole skirt is in tendrils hanging from the waistband.
  • To strengthen the waistband I separated my 3 layers of skirt from each other (carefully!) and I stuck a strip of packing tape all the way along the length of each skirt's waistband.  (It wasn't smooth or neat, but for strength it was necessary)
  • Now I had to connect all three skirts together again so I lined up two of them and used my packing tape to tape them together with a  piece overlapping the top (half on one skirt and then half on the other skirt.) 
  • I then repeated that attaching the two joined layers to the last layer.


  • To make our skirt wearable I used my trusty glue gun to attach a piece of ribbon on the inside of each end ensuring that when I tied the tightest knot it matched the waist measurement I had taken earlier.


And the rest is happy history.
Clever daughter had a great International Day. People liked her costume and knew what it was representing (whew!)  Admittedly the tissue paper strands of her skirt snapped off constantly when she sat down and she and some of the kids had fun chasing her around trying to steal the strands, so something stronger like perhaps green plastic would have been a much better choice if I had the materials.

This is what came home afterward:

Definitely no second use here...!  :)

I am Tracey and I am proud that I made a grass skirt for my little girl in 45 minutes!

Sunday 28 July 2013

Part 1 of 2: The Hawaiian Lei - Simple Hawaiian Costume for Kids On a Budget Against the Clock

So my Clever Daughter's school decides to have a fun dress up and learn kind of day called International Day.  The country designated to her year is China, but they can come dressed up as any country you like for a bit of variety.  The first words out of many moms' mouths were "I'll just get a Chinese dress off Amazon" and I don't blame them, that is usually me, but I can't imagine another use for a Chinese dress. I bought a witch outfit for Roald Dahl day, but that's Halloween taken care of too. I also bought a bat outfit for the Christmas play (don't ask) and that's...for...Halloween...too... Hmm.

I Will Do This Myself.

I considered a range of countries
  • American Cowgirl - I would have to buy boots!
  • Native American - I would have to buy boots and a skirt
  • South African - All I have is a flag and I feel it might be a bit disrespectful to wear an actual flag a dress
  • Hawaiian - I need a lei (the flower necklace) and a grass skirt.  But I did ponder just making the lei and dress her in shorts and a shirt for a modern surfer look.

Well for the purposes of not having to buy something expensive for a once-off event the Hawaiian girl was well in the lead. That Is Decided.

What I used for the lei:
  • So I bought a pack of multi-coloured tissue paper from Poundworld (£1)
  • I bought some embroidery thread (Poundworld £1)
  • I also own a needle set with a tapestry needle, but let's assume you buy a pack of needles from your friend and mine, Poundworld (£1

Now to make a Hawaiian lei!  I googled a bit and found this gorgeous website Dream a Lil' Dream and her fab homemade lei tutorial.  Simple and clear with lovely photographs, I could not go wrong.

Except I had flimsy tissue paper instead of crepe paper which is thicker and more sturdy.

Keep On Going!

So my lei came out slightly differently but I am so proud of it and Jenny loved it. And the best part was that it only took about 30 minutes.

Here's how:

  • My tissue paper pack was a sort of rainbow pack with each sheet a different colour.  I thought a rainbow effect would be pretty so I stacked the sheets together and then cut a 2 inch (approximately!) strip and ended up with about 11 colours which I then reshuffled into a rainbow-style colour graduation.  If you want a single colour then you will need to make multiple strips of the same width in the same colour.


  • I measured the length that I wanted the lei to be by draping the embroidery cotton around my neck and shortening it for my daughter. Now you will need to double that amount of thread for strength. 
  • Now thread the tapestry needle and take that to the centre point of the thread.
  • Tie the two ends together in a strong, bulky knot. The knot has to withstand a bit of pressure as the tissue paper pushes against it and you don't want it to just tear through.
  • Start stitching down the centre of your first strip of paper making stitches about 1cm long.
  • As you go, start bunching the paper backward toward the knot. Sometimes the paper may fold in on itself or look a bit wonky, just give it a gentle tug as if you were straightening someone's bow tie. Keep twisting the paper gently so it spirals around the cotton, this makes the effect much fuller and prettier.
  • As one piece of paper ends, start on the next in a continuous stream.

Keep going... almost there!

  • Once you have filled the length of the thread check that you are happy with the density of your lei. If you feel it's too stuffed with paper, take a sheet off and spread the rest around, or if it's too loosely covered you will need to add more paper or consider making the lei shorter.

Finished threading, just need to tie a knot.

  • Now snip off the needle and tie the two ends of the lei together as closely as you can so there isn't a noticeable gap. You want to achieve the appearance of an unending circle of flowers.
The completed lei.

Clever Daughter loved it and managed to wear it all day. Even now it is in the dress up box still looking pretty good, if a little squashed.

I am Tracey, and I know the secret to making a pretty Awesome Hawaiian lei.

**In my next post find out how I made a grass skirt.**

Saturday 27 July 2013

Slow Cooker Condensed Milk Caramel (Dulce De Leche)

I wanted to make a lovely sticky centre to my cupcakes and remembered all the stories I had heard of boiling a tin of condensed milk for hours to create a gorgeous caramelly goop (technically called dulce de leche). 

Those were the stories where the tin did NOT literally explode and cover the kitchen and ceiling in sticky, almost impossible to remove caramelly goop.

I like the first story better.

But boiling a tin of condensed milk for hours and making sure it is covered with water sounds like of a lot of - potentially dangerous - work to me.  So I googled "condensed milk in slow cooker" and found this post  from www.queenbeecoupons.com which made me very happy.

Away we go!  The brand I bought (Carnation) seems to print their label straight onto the tin so you can't remove it anyway, but if yours is paper you had better pull it off first or your crockpot/slow cooker will never be the same.  I also am not able to fit a plate into my slow cooker to prevent rusting, but lucky for me, it didn't show any sign of staining or rusting at the end.

Method:
  • Pop your tin of condensed milk into your slow cooker
  • Fill the cooker with boiling water from your kettle until it is over the top of the tin.
  • Put on the lid
  • Set to cook on Low (I searched but couldn't find anyone on the web who had achieved good caramel on the high setting)
  • Leave to simmer away, undisturbed, for 8 hours
No, definitely don't open the cooker lid, you can't see through tin anyway, you will have to trust me.
 
  • If you have managed to wait then remove the tin from the water with a pair of tongs or similar. The tin WILL BE HOT.
  • Leave for a short while just to cool a bit.
  • Grab your tin opener and crack that baby open (but if it is still hot then keep a tea towel around it).
It will squeeze out at the first opportunity, so mind your hands if it's still hot!
 
 
Doesn't that look DIVINE?
 
  • Let it plop into a bowl or similar (no, you may NOT lick the tin, it will cut you!)


It's quite thick and set when it comes out the tin.
 
  • Give it a good mix to smooth it out, a whisk may be necessary.
 
  • Enjoy it any way you like!
 
This caramel is super rich, sweet, smooth and sticky.  Perfect!
 
I am Tracey, and I love condensed milk caramel in a slow cooker.

Thursday 25 July 2013

Teacher Appreciation Cupcakes - Apple Cupcake Toppers

Our little group of school mums decided to club together for gifts for Jenny's reception teachers and classroom assistants. Yay, no crazy gift shopping! 

But then I saw this tutorial from Victorious Cupcakes on www.Goodtoknow.co.uk recipes for teacher thank you cupcakes. 

Feeling Inspired, I decided to make our teachers some pretty vanilla cupcakes with apple toppers to share between them as a little personal thank you. Who Is Feeling Brave?!

So I dashed off to Pipedreams which is my nearest proper cake decorating store and bought two lovely silver boxes which carry 12 cupcakes each.   I tried to find a "thank you" stamp or something with small enough letters for a cupcake topper but there was nothing suitable unfortunately. 

Creating the Apple Toppers:

**This part needs to be done about 24 hours in advance to allow the fondant to dry**

Spending a fun afternoon together Clever Daughter and I had made the fondant elements of the apple. Admittedly I was really responsible for rolling fondant and advising, and she did all the hard stuff because I figured the teachers would appreciate it more from her little fingers.

She's not called Clever Daughter for nothing.


We used:

9" 23cm Rolling Pin - Non Stick Polyethylene


Ready-coloured fondant in Green and Red and a little Black. I used Dr.Oetker Regalice Ready to Roll Icing Colours 500g


10 Sets (30 Pcs) Plunger Cutters Sugarcraft Cake Decorating


Tala Pastry Cutters Set 6 Plastic

I used the cutter which was slightly smaller than the dimensions of the top of the cupcake.


Cornflour/Cornstarch to stop the fondant sticking to your rolling surface.

A small palette knife or non-serrated knife for cutting, and additionally to transport elements of the apple from the rolling area to the drying area.


Step 1: Leaves

  • Roll out your green fondant on a nice sprinkling of cornflour.  It does not have to be wispy thin, just a sensible strong width for a little leaf. I would guess at about 2mm thick.
  • Using your smallest rose leaf cutter push into the fondant, give it a wiggle to loosen your leaf and then press down on the plunger to impress the veins.
  • Now pick it up and when over a plate or good drying surface press the plunger down again and the leaf should drop right out. 
  • Leave to dry (I love an unexpected pun).


(the yellow cones visible on the plate were for our roses - this will be covered in another post)

Step 2: Apples
  • Now roll out the red fondant, as with the leaf this should not be super thin or they will break  the moment you put them on the cupcake. Again, I estimate at 2mm thick.
  • Using the smooth side of a round cookie or pastry cutter cut out circles of fondant. 
  • If I had a small letter press I would have imprinted "Thank You" in the middle of the apple at this stage.
  • Using a knife cut a small triangle out of the top and a very wide and shallow triangle from opposite side. Please do keep the remaining fondant and waiting circles covered with cling film or they will dry more quickly than you think and you will find it very difficult to smooth the edges effectively.


  • Now smooth those pointy edges with your fingers as if you are making a rounded heart shape on both sides. Once the top and bottom of the apple are curved and you will see that it has achieved a recognisable apple shape.
 
  • Allow to dry on a flat surface.
 

Step 3: Stalk

  • For the stalk take a small quantity of brown fondant (we mixed black and red together to achieve our brown colour), roll it out into a strip and then cut it so it looks like a ribbon about 1cm wide.
  • And then using your palette knife or smooth knife start cutting at about 4mm intervals and you will see our stalk.

 
  • Since the apple was generally looking pretty 2 dimensional I decided not to roll the twig to make it rounder, but rather embrace it's flat shape.
 
The Cupcakes!
 

The next day I baked 24 cupcakes using the Hummingbird vanilla cupcake recipe. I had recently read an article about how you shouldn't make batches of cake batter in double or half portions as it can be the chemistry of the ingredients in the original quantities which makes the cake work. So I faithfully made the first batch and while baking them I mixed up the second. I must say I did feel a bit silly, but I have to place my trust in the professionals.

Unfortunately I overcooked the first batch a bit. I got The Fear that they weren't really done and gave them another 3 minutes. Too much!  Not burnt, just a bit dry (I know because I ate one - shhh!).  The second batch was allowed no such sympathy. Spot on time, perfect bounce, clean skewer, very happy.

While they cooled I whipped up a batch of Loryn's - should be patented - buttercream icing mix which looks a bit like this:
  • 250g unsalted butter at room temperature
  • 1kg icing sugar
  • big dollop of cream cheese (I use Philadelphia original)
  • about 1-2 tablespoons water added with caution to loosen it a bit.
  • I also add a good splash of vanilla extract, well, because I love vanilla.
Keep a small quantity of butter cream aside (about 2 tablespoons at most) for attaching the leaves.

Preparing the Cupcakes:

We used:


1M icing nozzle
Jem 1M & 2D Stainless Steel Tips


Disposable piping bags
1 Roll of Savoy Disposable Piping Bags - 100 12" Bags


To pipe a rose
You need to always swirl from the centre outward, nozzle pointing 90 degrees to the cake surface and keeping it about 1.5cm above allowing the icing to fall onto the cupcake as you squeeze, while swirling around. When you have reached the edge of the cupcake stop squeezing and drag the bag away which breaks the icing off but may leave a messy edge, just pat it down gently with your finger for a nicer finish.


24 lovely cream coloured roses!  They were so pretty that I decided not to make all of the cupcakes have toppers (not everyone likes fondant anyway!) and just shook a pinch of red sprinkles over the top of  half of the cupcakes.
 

Time to assemble our apples!

On our freshly iced cupcake place the apple shape, and then the stalk as close as possible but not overlapping.

Now put a little of our extra buttercream on the back of one rose leaf and stick it down to cover the point where the stalk and the apple meet.

Tadaaaah!  Fantastico!


Well the teachers definitely liked them anyway!  And they made Clever Daughter feel like the smartest kid in town, fussing her for making such fabulous things.  Which sounds like it had the opposite of the intended effect as they were supposed to make the TEACHERS feel special, but when you think about why they're fussing her it's sort of the same thing.

I am Tracey, and we make teacher-worthy cupcakes.

Disclaimer: The items linked to are what I have bought in the stores I bought them from but these are subject to change by the stores and you may find better value at a different store, listing, manufacturer or quantity.

Monday 22 July 2013

Update to "Why am I doing this?": Epic Awesomeness sometimes requires unashamed self-promotion

Right, so if you have read my previous post you will know that I am super proud of my monster cake.

It is currently my avatar, but here it is again:

Yes. Super.

And you will also know that I purchased the recipe for this awesome rainbow cake from Janet of Quaint Cakes. Now why I think of Janet first when I think of recipes is that her Facebook page   always has testimonials from people thanking her for a great recipe and showing what they made or how completely enormous their cake was when baked.  Usually I hate being advertised to, but this I strangely like. Real people, real cakes, not all professionals. People just saying "look how your awesome recipe helped me".

So I debate it for a while, who knows maybe MY cake will appear on her page! But what if people are mean about it? What if they don't care?  I take a moment to slap myself and remind myself to seek out the Epic at all times. GO FOR IT YOU WIMP!

I send Janet a thank you note, which was completely sincere, and a picture of the inside and outside of my monster cake

Well, lovely Janet emails to say can she use my testimonial and I say I would be honoured, but think She Probably Says That To Everyone and know there is a good chance I will never see the Monster on her page. 

But Hooray! That afternoon, there he is*:


I was so excited!  And then the "likes" started rolling in.   There were even a few lovely comments.  People really thought he was cool!  At my last check he had 100 likes!  I was so amazed.

Thank you lovely people for making one woman so happy. I know it's just a click on a like button, but it's a click you made, and it's like a little pat on the back. I treasure every one.

Thank you for making my day Epically Awesome.


I am Tracey, I feel Epic.

* As Janet has refilled the photo into a different album all the likes and comments have been lost. I am so glad I took that screen shot or I might think it was all a dream!